Building a high-qualityLEDディスプレイthat’s stable, 明るい, and visually stunning isn’t just about stacking modules—it’s about nailing every detail from client conversations to final power-up. I’ve spent 8 years installing LEDs, and I’ve seen it all: rework from bad measurements, burnt boards from wrong wiring, and clients disappointed by blurry screens. 今日, I’m breaking down theexact step-by-step processto build an LED display—plus thecritical mistakesto avoid so you save time, money, and headaches.
私. Preliminary Communication: Lock Down Requirements (Or Regret It Later)
The first step inLEDディスプレイbuilding isn’t buying materials—it’stalking to your client. Get these 3 things right, and you’ll skip 80% of future problems:
1. Confirm Installation Location & タイプ
Mounting Style: Is itrecessed (built into a wall), wall-mounted, or freestanding? For recessed screens, remind the client to reserve carpentry space 10mm larger than the screen (例えば, a 3940×2020mm screen needs 3950×2030mm). そうでない場合, you’ll be hacking into walls to make it fit—trust me, it’s not fun.
環境: 屋内または屋外? Outdoor screens need awaterproof back panel (aluminum composite or OSB board). Indoor recessed screens don’t, but theymusthave 300mm of depth for heat dissipation.
2. Nail Down Screen Specs
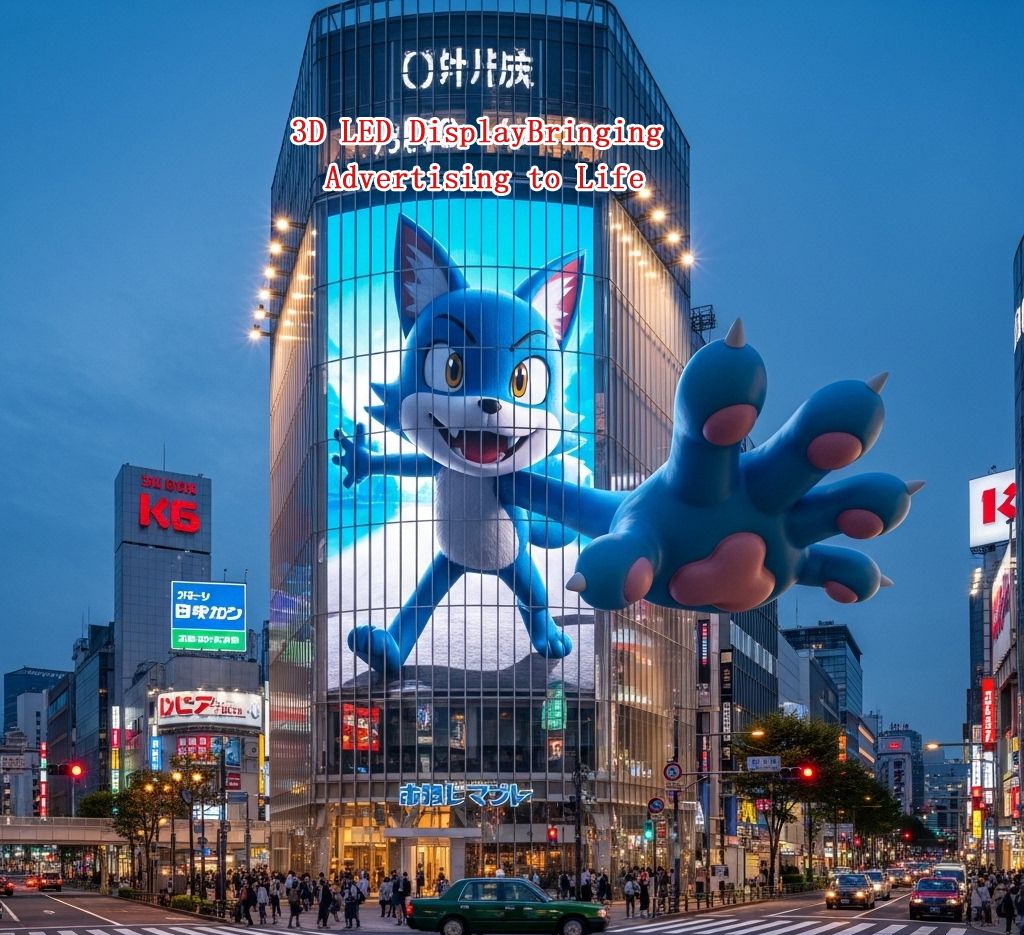
3D LED広告ディスプレイ – Dynamic Ad Effect Featuring a Blue Cartoon Fox Leaping from Building Facade – Outdoor Digital Signage Case Study in Urban Commercial District
ピクセルピッチ: This is non-negotiable. Indoor screens useP2/P3 (smaller = sharper). Outdoor screens needP10/P16 (bigger pixels = less glare).
Dimensions: Calculate screen size usingmodule dimensions. 例えば, ある P2 module (320×160mm) ニーズ 12 modules for a 3.94m-wide screen (12×320mm=3840mm—add 10mm for frame tolerance). Pro tip: Always confirm thevisible display areawith the client—not the outer frame. Most clients mix these up!
3. Agree on Aesthetics
If the client wantsblack brushed titanium edging, clarify: Edging clips onto the frame and must be installed after the screen is assembled. Install it too early, and you won’t fit the modules.
Ⅱ. 材料 & ツール: List Everything (No Last-Minute Runs)
LEDディスプレイbuilding requires 4 core material categories—and tools that can cut, drill, and strip wire. Skip something, and you’ll be stuck mid-project:
1. Material List (Indoor P2 Embedded Screen Example)
カテゴリ
材料 & Specs
注意事項
Frame
Aluminum extrusions (例えば, 9035 profile), corner connectors, magnetic rails
Magnetic rails let you attach modules without screws—game-changer!
Display Panel
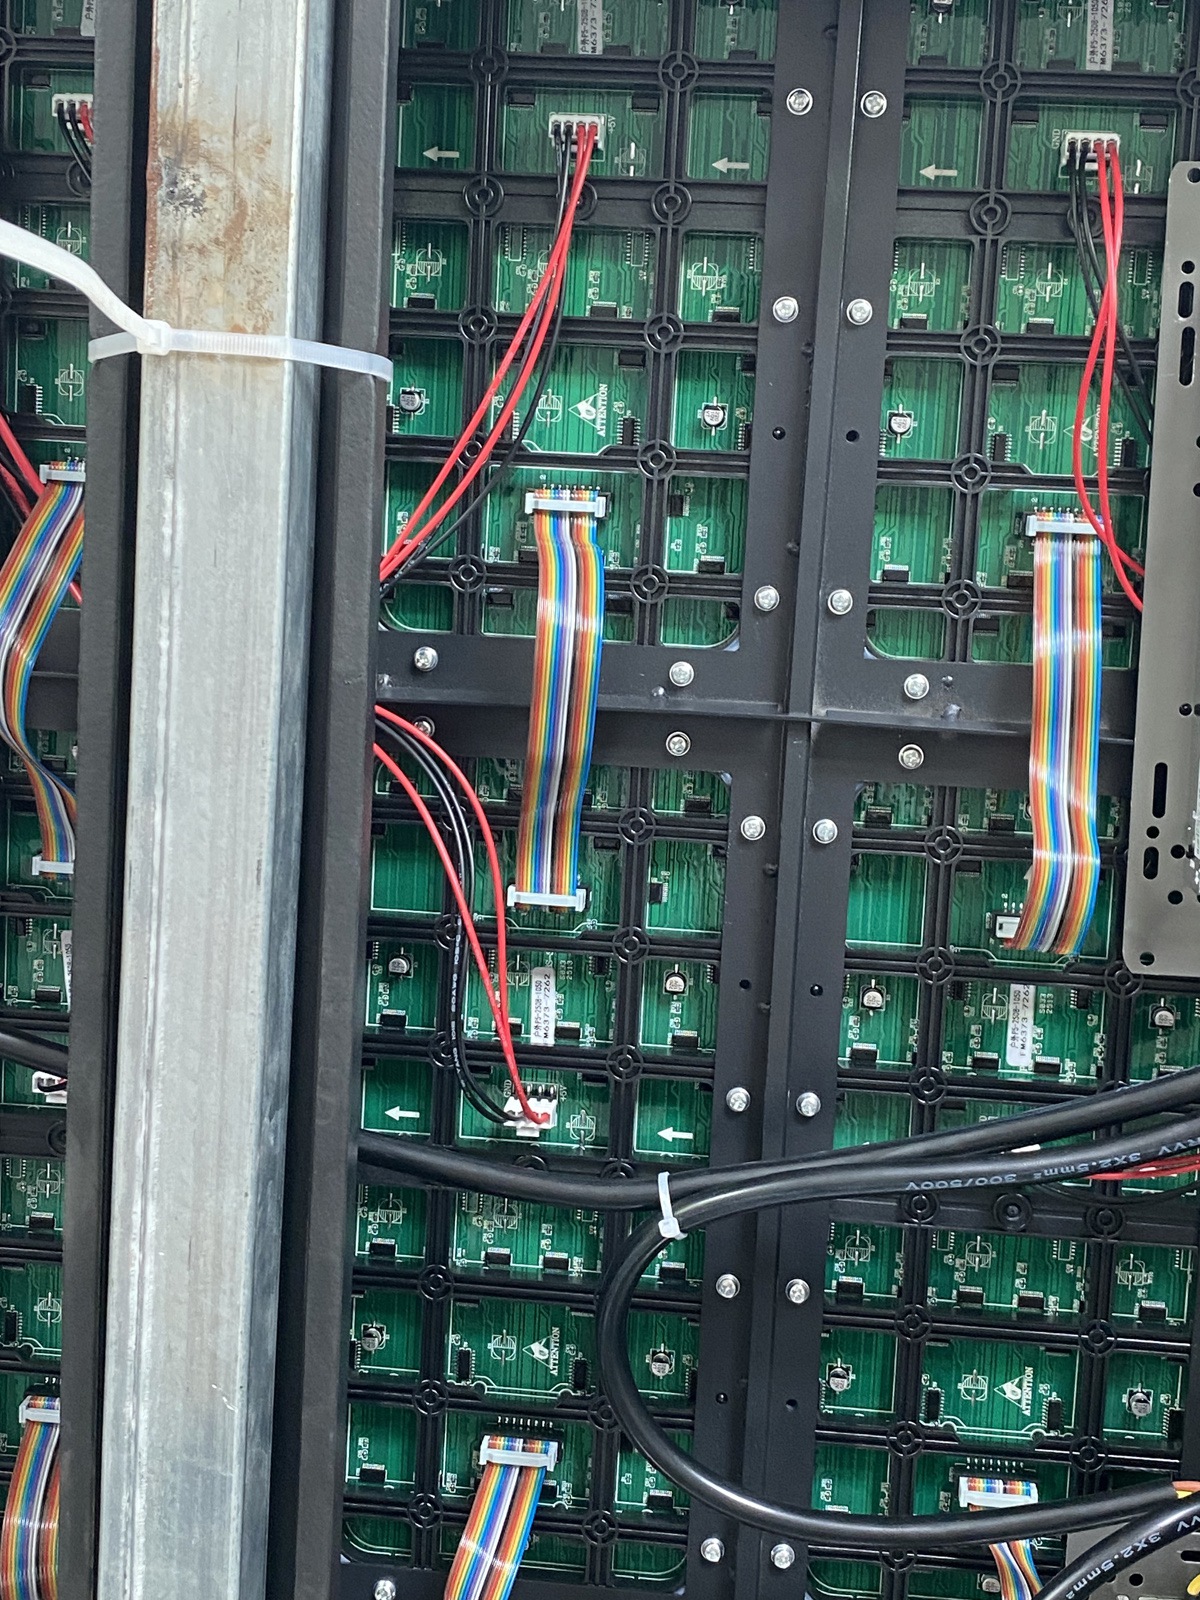
Xvisuallive P2 Full-Color E Series Modules (320×160mm), 16P ribbon cables
Ⅲ. Frame Assembly: Precision Is King—1mm Off = Big Problems
The frame is your screen’s skeleton. If it’s crooked, the modules will be too. Use aweld-free E-structure (CNC-machined for precision)—it’s easy to assemble and super accurate.
1. Cut & Assemble the Frame
Measure twice, cut once: Cut aluminum profiles to match the screen’s net size (subtract 4mm for tolerance—5mm if over 3m).
Secure corners: Use self-tapping screws to attach corners to profiles. Tighten firmly—loose corners = wobbly frame.
2. Install Magnetic Rails
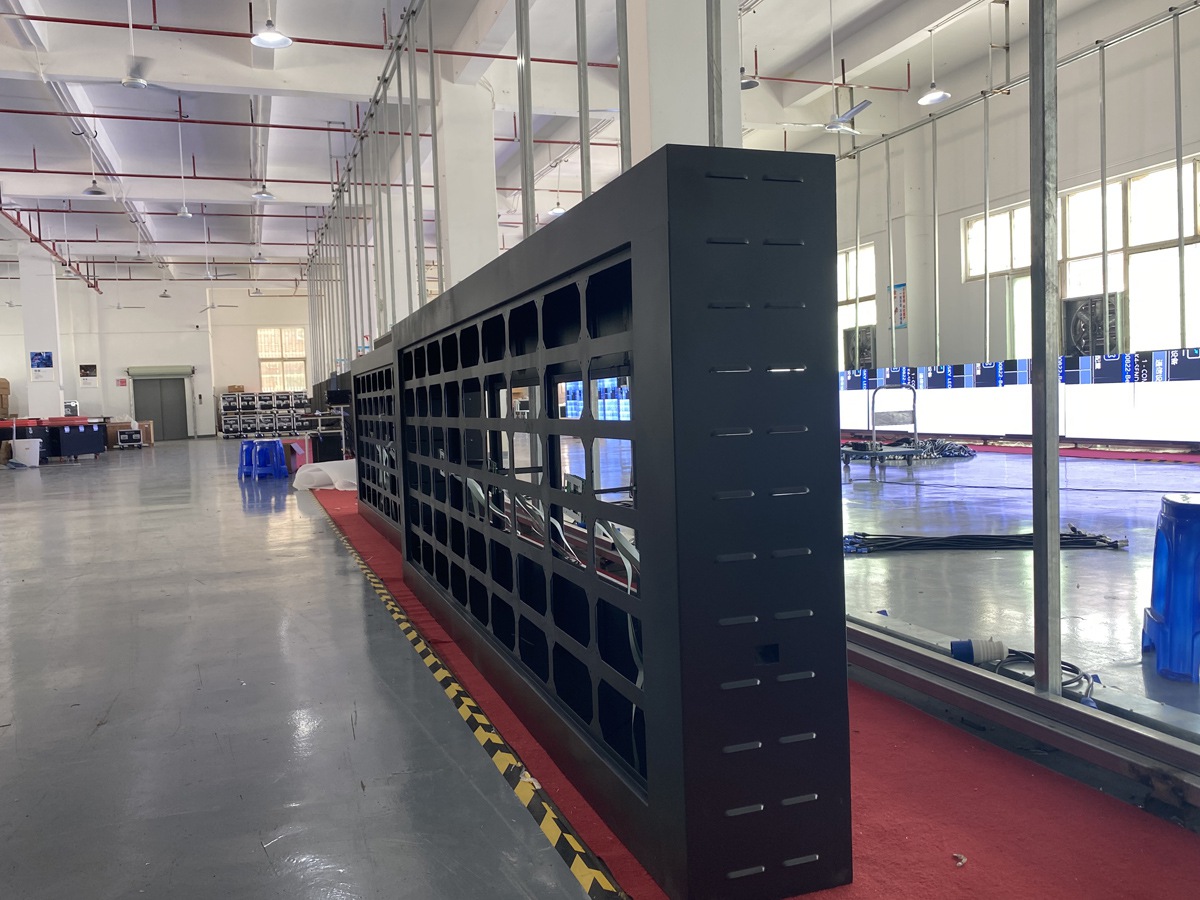
Large LED display cabinet in a spacious factory workshop, showcasing the manufacturing process of outdoor LED screens.
Align magnetic rails with module height (例えば, 160mm for P2 modules). Make sure rails are level—use a spirit level! Unlevel rails = uneven modules.
Live view only: Don’t use a phone camera—LED screens look bad in photos. Let the client see therealeffect.
Train them: Show how to change content, adjust brightness, and troubleshoot basic issues. This saves you future calls!
Final Pitfall Summary (Save This!)
Pre-communication: Nail location, specs, and aesthetics—no assumptions.
Wiring: Parallel power, correct polarity—double-check every connection.
Cleaning: Debris = short circuits—don’t skip it.
Power sequence: Power supply first, then control card.
Building anLEDディスプレイis about precision and patience. Skip a detail, and you’ll pay for it later. Follow this guide, and you’ll get a screen that’s stable, 明るい, and client-approved—every time.