When installingseamless LED displays, 2 つの基本原則が最も重要です: achieving a perfectly flush edge-to-edge fit and ensuring uninterrupted signal transmission for seamless image continuity. With five years of LED installation experience, I’ve witnessed countless technicians skip critical details because they “found it too troublesome”—only to end up with gaping seams, misaligned images, and late-night rework. 今日, I’ll lay out the most practical installation steps and essential pitfalls to avoid, so you can succeed on your first try.
Before assembling, confirm these three points—don’t discover issues halfway through:
1. Screen Inspection
Check each panel for warped bezels or dust on edges. Wipe dust from edges (otherwise gaps will appear after assembly). Replace warped panels immediately; don’t force them into use.
2. Tools Ready
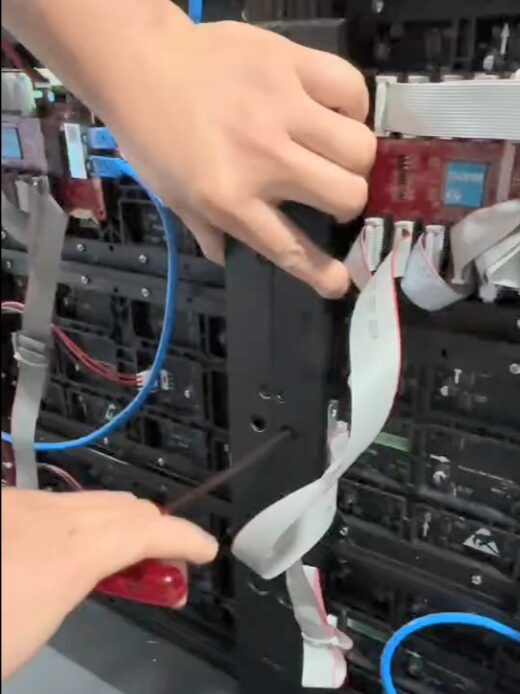
Hands using a screwdriver to fix and assemble parts of an LED video wall, with connected cables and electronic components visible during the installation process.
Gather a level (to check flatness), HDMI cable (version 2.0 or higher—skip cheap options), and screwdriver (for tightening the splicing lock).
3. Clear Workspace
Ensure the assembly area is spacious and clutter-free. Clutter makes it easy to bump and misalign screens during handling.
Ⅱ. Step One: Screen Alignment — “Level” is the Key to Seamlessness
Seamless integration hinges on perfectly aligned screen edges. Don’t rush this step—taking your time pays off:
1. Positioning
Move all screens to the installation area and arrange them side-by-side with edges aligned (例えば, for a row of 4 画面, align each screen’s left bezel with the right bezel of the preceding screen).
2. Check Levelness
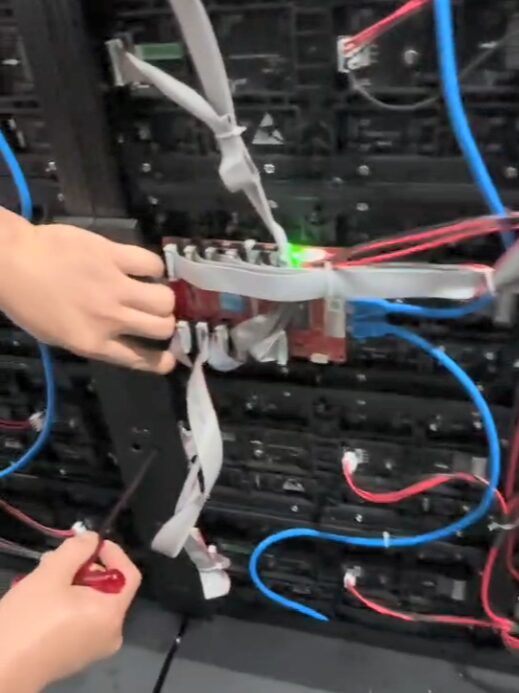
onnecting cables to an LED video wall module, with visible wiring and electronic components during the assembly process.
Use aspirit levelto measure the top and sides of each screen, ensuring all screens are on the same plane (the naked eye can be unreliable; the spirit level is the definitive standard). If any screen is tilted, adjust its position first—don’t wait until after locking it.
3. Reminder
It’s best to work with a partner—one person holds the screen steady while the other aligns it, preventing the screen from falling or tilting.
Ⅲ. Step Two: Lock the Seam Connectors — Align First, Secure Later
After screens are aligned, secure them withseam connectors. This step directly determines gap size:
1. Locate Seam Connectors
Each screen has connectors on its back (typically on both sides). Align them with the adjacent screen’s connectors.
2. Locking Technique
Follow these steps for a tight, gap-free fit:
初め, turn the locking knob to the “loose” position, allowing the edges of both screens to fully contact.
Have someone stand in front to check: Confirm no gaps or height differences on the front beforeclockwise tighteningthe connector (avoid excessive force—this deforms the frame).
Check every connection: のために 4 画面, tighten all 3 connection locks—don’t skip the middle ones.
3. Pitfall Avoidance
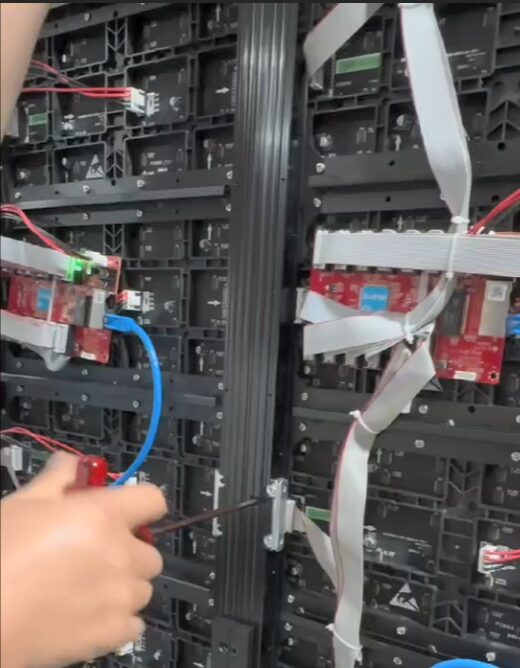
Hand using a screwdriver to tighten screws for fixing LED video wall panels, with connected cables and electronic components visible.
If gaps appear after assembly, loosen the locks, realign, then retighten—never force the screens (this damages bezels).
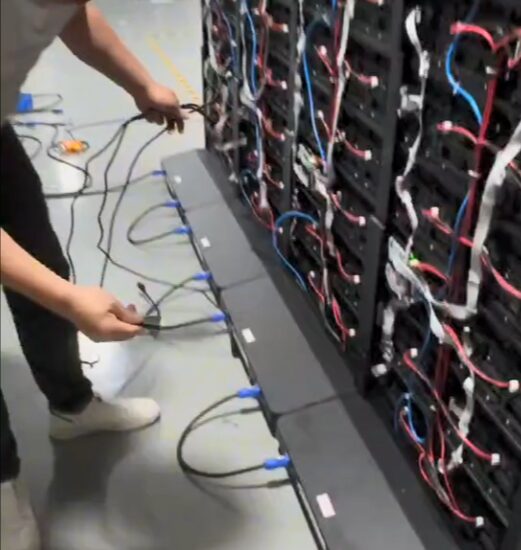
Ⅳ. Step Three: Connect HDMI Cables — Do Not Reverse the Order!
Signal transmission depends entirely on correct cable routing. Remember the“output connects to input”principle:
1. Identify Ports
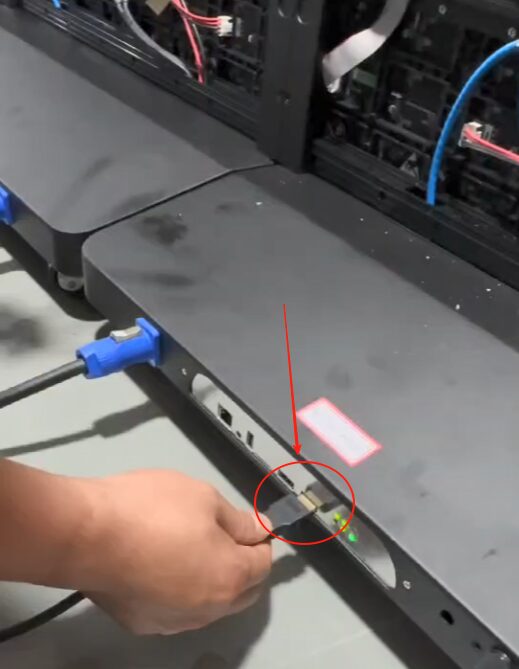
Each display has two HDMI ports: one labeled “OUT” (出力) and one labeled “IN” (input).
2. Connection Sequence
connecting input and output signal cables to a large LED video wall with complex wiring
For a row of 4 画面:
Connect the OUT port of the first screen (leftmost) to the IN port of the second screen.
Connect the OUT port of the second screen to the IN port of the third screen.
Connect the OUT port of the third screen to the IN port of the fourth screen.
ついに, plug the signal source (例えば, computer, media player) into the IN port of the first screen.
3. Reminders
Ensure cables are securely plugged in (loose connections cause flickering or blackouts).
使用 HDMI 2.1 cablesfor long distances (以上 5 メートル) to prevent signal degradation.
Avoid coiling cables or placing them under screens—this causes damage.
v. Step Four: Testing the Display — Success is Marked by a “Whole” Image
After connecting cables, power on for testing. Follow this order to avoid damage:
1. Turn On the Power
Person connecting input and output signal cables to a large LED video wall with complex wiring
First power on each display, then the signal source (例えば, computer). Reversing this order may burn the screen.
2. Check the Display
If all screens show asingle, seamless image (例えば, one photo spanning 4 screens with no splits), you’ve succeeded!
3. Troubleshooting Common Issues
Image Misalignment: Check if connectors are fully tightened, then verify HDMI cables are correctly plugged in.
Flickering Image: Replace the HDMI cable or ensure it’s securely connected.
Blank Screen: Confirm power is on for that display or the HDMI cable isn’t reversed.
VI. Technician’s Ultimate Pitfall Avoidance Tips
Clean before assembly: Dust on edges causes gaps—wipe screens thoroughly.
Don’t over-tighten: Excessive force deforms bezels, creating permanent gaps.
Use quality cables: Cheap HDMI cables lose signal (especially for long runs).
Team up for large screens: のために 6+ 画面, one person holds while another locks—prevents warping.
全体: Seamless installation isn’t difficult—just get the details right.
The logic behindseamless LED screen installationis simple: align flat, lock tight, plug correctly. I’ve seen many beginners rush to finish, skipping alignment or using subpar cables, only to redo work multiple times. Following these steps, assembling four screens takes no more than an hour and rarely results in errors.
覚えて: The key to seamless integration lies in the “details”—execute each step thoroughly, and the final result will surely satisfy your clients!