В изогнутом Светодиодный дисплей проекты, Точный расчет длины дуги, Длина аккорда, а сагитта напрямую определяет точность склейки дисплея, совместимость установки, и визуальный эффект. Будь то изогнутый экран для конференций в помещении, изогнутый рекламный экран на открытом воздухе, или иммерсивный круглый экран для заведения, отклонение в расчетах, превышающее 10 см, может привести к тому, что модули не подойдут друг к другу., большие промежутки между кадрами, или даже необходимость перенастройки экрана, что приводит к напрасным затратам и задержкам проекта.. В этой статье систематически объясняется логика расчета ключевых размеров изогнутого светодиодного дисплея с четырех точек зрения.: методы измерения, принципы формулы, практические примеры, и контроль ошибок, помочь инженерам избежать распространенных проблем и добиться точной установки.
я. Основные понятия и предпосылки измерения: Первый, Поймите “Три ключевых измерения”
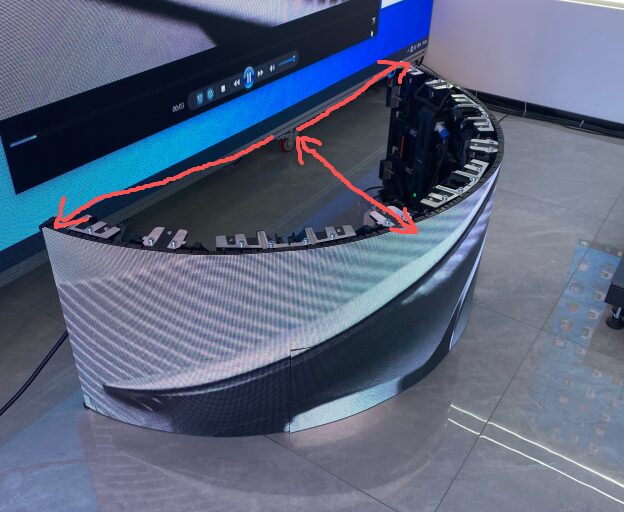
Прежде чем рассчитывать, вы должны четко определить три основных размера изогнутого светодиодного дисплея, чтобы избежать ошибок измерения, вызванных концептуальной путаницей..
1. Определения трех ключевых измерений
- Длина аккорда (2а): Расстояние по прямой между двумя конечными точками дуги. Это прямое представление “горизонтальный пролет” кривой. Например, Расстояние по прямой между двумя точками крепления изогнутого рекламного экрана для наружной рекламы представляет собой длину хорды.. Обычно его представляют как “2а” (где 'а’ составляет половину длины хорды) для облегчения последующих вычислений прямоугольного треугольника.
- Стрелка (б): Расстояние по вертикали от середины хорды до самой высокой точки дуги.. Это определяет “кривизна” дуги. Чем больше сагитта, тем круче кривая; чем меньше сагитта, тем более пологая кривая (ближе к прямой линии). Например, расстояние, на которое выпирает изогнутый экран для конференций в помещении по краям в центре, — это сагитта.
- Длина дуги (л): Фактическая длина самой дуги, который представляет собой “общая длина” собранных светодиодных модулей. Поскольку дуга является кривой, его нельзя измерить непосредственно рулеткой. Его необходимо рассчитать, используя длину хорды и сагитту.. Это также основная основа для определения количества модулей при настройке экрана. (Количество модулей = Длина дуги ÷ Длина одного модуля.).
2. 3 Основные приготовления перед измерением
- Выбор инструмента: Расставьте приоритеты при использовании лазерного дальномера (точность ±1 мм) измерить длину хорды, чтобы избежать ошибок, вызванных растяжением рулетки. Для измерения стрелок, а “уровень духа + рулетка” комбинация необходима для обеспечения того, чтобы измерение было перпендикулярно длине хорды (если наклонен, измеренная сагитта будет больше).
- Требования к среде измерения: Замеры на открытом воздухе следует проводить в безветренную погоду, чтобы рулетка не раскачивалась.. В жарких условиях, перед использованием подождите, пока температура лазерного дальномера стабилизируется. (на каждые 10°C изменения температуры, точность может отличаться на 0.1%). Для измерений в помещении требуется плоская поверхность, чтобы избежать отклонений длины хорды, вызванных уклонами земли..
- Маркировка точки измерения: Четко отметьте две конечные точки и середину дуги. (например, с лентой или крестиком). Рекомендуется измерить каждую точку 3 раз и принять среднее значение в качестве окончательных данных (например, если длину хорды измерить трижды как 200,2 см, 199.8см, и 200,0 см, возьмем среднее значение 200,0 см, итак 2а=200см).
II. Точные методы измерения длины хорды и сагитты: Избегать 3 Распространенные ловушки
Длина хорды и сагитта являются основными данными для расчета длины и радиуса дуги.. Ошибки измерений напрямую увеличивают последующие отклонения в расчетах., поэтому вы должны строго следовать стандартным процедурам и избегать следующих ошибок.
1. Измерение длины хорды: Устранить “Две точки не по прямой” Ошибка
- Правильные шаги измерения:
- Определите конечные точки: Найдите две крайние конечные точки дуги. (Точка А и Точка Б) и убедитесь, что линия, соединяющая их, покрывает максимальный горизонтальный пролет дуги. (если конечные точки отключены, длина хорды будет меньше).
- Горизонтальная калибровка: С помощью уровня убедитесь, что точка А и точка Б находятся в одной горизонтальной плоскости. (если наружная площадка неровная, поместите колодки одинаковой высоты в двух точках, а затем измерьте расстояние между верхушками колодок.).
- Лазерное измерение расстояния: Поместите лазерный дальномер вплотную к отметке в точке А., нацельте его на отметку в точке B, держите счетчик параллельно линии, соединяющей две точки, и прочитать данные. Повторить 3 раз и возьмем среднее значение.
- Распространенные ловушки и способы их предотвращения:
- ловушка 1: Использование рулетки прямо по земле, не обращая внимания на уклон земли. Например, с наклоном 3° и длиной хорды 200 см., Измерение может отличаться примерно на 10,4 см. (грех3°× 200 ≈ 10.4).
- Избегание: Используйте спиртовой уровень для калибровки, чтобы убедиться, что направление измерения горизонтальное., или используйте лазерный дальномер с компенсацией наклона.
- ловушка 2: Нечеткая маркировка конечных точек, приводящая каждый раз к разным точкам измерения..
- Избегание: Несмываемым маркером нарисуйте крест диаметром 5 см в конечных точках., и используйте пересечение креста в качестве ориентира для измерения..
2. Измерение стрелки: Гарантировать “Перпендикулярная средняя точка” Точность
- Правильные шаги измерения:
- Найдите среднюю точку аккорда: Используйте рулетку, чтобы найти середину (Точка О) длины хорды (от А до Б) (если длина хорды 200см, Точка О находится на расстоянии 100 см от А и В.). Марк Пойнт О.
- Перпендикулярное позиционирование: Выровняйте вертикальный пузырь спиртовым уровнем и поместите рулетку в вертикальном направлении. (перпендикулярно длине хорды). Совместите один конец рулетки с точкой О, а другой конец доведите до самой высокой точки дуги. (Точка С), чтение расстояния OC, что такое сагитта «б».
- Множественные проверки: Измерьте вертикальное расстояние на расстоянии 10 см слева и справа от точки О. (Очки О1, О2). Если разница между O1C, О2С, и OC составляет ≤2 мм, это указывает на то, что точка C является истинной средней точкой дуги.. Если разница слишком велика, еще раз подтвердите самую высокую точку дуги.
- Распространенные ловушки и способы их предотвращения:
- ловушка 1: Измерение сагитты в направлении, не перпендикулярном длине хорды., что приводит к большему измерению. Например, измерение сагитты длиной 60 см под углом 5° даст фактическую сагитту всего 59,7 см. (cos5° × 60 ≈ 59.7).
- Избегание: Используйте прямоугольную линейку или спиртовой уровень, чтобы убедиться, что рулетка расположена перпендикулярно длине хорды.. При необходимости, используйте генератор лазерных линий для проецирования вертикальной базовой линии.
- ловушка 2: Ошибка “крайняя точка дуги” для “самая высокая точка.” Например, если модуль выступает за край изогнутого экрана, вы можете ошибочно принять это за точку C, что приводит к меньшему размеру сагитты.
- Избегание: Наблюдайте за общей кривизной дуги и ощущайте ее, чтобы подтвердить самую высокую точку., или используйте лазерный генератор линий, чтобы спроецировать линию вдоль длины хорды и найти самую дальнюю от нее точку..
III. От длины хорды и сагитты к длине дуги и радиусу: Принципы формул и практические примеры
Основа расчета размеров изогнутого светодиодного дисплея основана на “прямоугольный треугольник + дуговые отношения окружности.” Используя длину хорды (2а) и стрелка (б) построить прямоугольный треугольник, а затем объединив его с тригонометрическими функциями и формулой длины окружности, вы можете определить радиус (Р) и длина дуги (л). Следующие шаги разбивают процесс расчета на практический пример. (2а = 200 см, б = 60см).
1. Шаг 1: Постройте прямоугольный треугольник, чтобы вычислить гипотенузу. (с) Половина длины хорды (а), стрелка (б), и “часть радиуса окружности, частью которой является дуга, минус стрелка (Р-б),” вместе образуют прямоугольный треугольник (как на рисунке 1):
- Нога 1: a = Длина хорды ÷ 2 = 200 см ÷ 2 = 100 см
- Нога 2: Р – б (R — радиус окружности, частью которой является дуга., что на данный момент неизвестно)
- Гипотенуза: с = Р (потому что гипотенуза — это линия, соединяющая центр окружности с конечной точкой дуги., какой радиус) По теореме Пифагора (сумма квадратов двух катетов прямоугольного треугольника равна квадрату гипотенузы): а² + (Р – б)² = Р²
- Замена значений примера (а=100см, б=60см): 100² + (Р – 60)² = R² Расширение расчета: 10000 + Р² – 120Р + 3600 = R² Устранение R² и перестановка: 13600 – 120Р = 0 Решение для R: Р = 13600 ÷ 120 ≈ 113.3см (Радиус круга, частью которого является дуга, составляет примерно 113,3 см.)
- Примечание: Вы должны избегать ошибки “прямой расчет гипотенузы с использованием a и b и рассмотрение ее как радиуса.” Правильная логика — составить уравнение, используя теорему Пифагора, и найти радиус R., не вычислять напрямую гипотенузу прямоугольного треугольника.
2. Шаг 2: Вычислить центральный угол дуги (я) Центральный угол — это угол, образованный линиями, соединяющими две конечные точки дуги с центром круга. (как показано ∠AOB на рисунке 1). Он определяет долю всего круга, которую занимает дуга, и является ключом к расчету длины дуги..
- Логика расчета: В прямоугольном треугольнике (ОАК), cos∠AOC = прилежащая сторона ÷ гипотенуза = (Р – б) ÷ Р. ∠AOC — половина центрального угла ∠AOB (потому что OC перпендикулярно делит AB пополам., разделив ∠AOB на два равных угла), так: ∠АОБ = 2 × ∠АОК
- Замена значений примера (R≈113,3 см, б=60см): Р – б = 113.3 – 60 = 53,3 см cos∠AOC = 53.3 ÷ 113.3 ≈ 0.47 С помощью калькулятора “функция обратного косинуса (Арккос)” рассчитать ∠AOC: ∠AOC ≈ arccos(0.47) ≈ 61.9° Поэтому, центральный угол ∠AOB = 2 × 61,9° ≈ 123.8° (примерно 124°, соответствует исходному делу).
- Дополнительное примечание: Если вы используете функцию синуса, грех∠AOC = а ÷ R = 100 ÷ 113.3 ≈ 0.88, что дает ∠AOC ≈ 61,6°.. Результаты аналогичны (разница возникает из-за округления десятичных дробей). Оба метода работают, но рекомендуется основывать расчеты на значении R, решенном с использованием теоремы Пифагора, чтобы избежать накопленных ошибок..
3. Шаг 3: Рассчитать длину дуги (л) На основе центрального угла и окружности Длина дуги — это фактическая длина кривой.. Это равно “окружность всего круга, умноженная на отношение центрального угла к 360°.” Формула: Л = (θ ÷ 360°) × 2πR Где π примерно 3.14, θ - центральный угол (в градусах), и R - радиус.
- Замена значений примера (θ≈124°, R≈113,3 см):
- Первый, вычислить длину окружности: 2πR = 2 × 3.14 × 113.3 ≈ 711,5 см
- Вычислить пропорцию дуги круга: 124° ÷ 360° ≈ 0.344
- Длина дуги L = 0.344 × 711.5 ≈ 244.8см (примерно 245,5 см, соответствует исходному делу, с разницей из-за округления десятичного центрального угла).
- Логика проверки: Если вы вычислите его напрямую, используя “длина дуги на градус × центральный угол” (Длина дуги на градус = 2πR ÷ 360 ≈ 711.5 ÷ 360 ≈ 1,98 см/градус), длина дуги L = 1.98 × 124 ≈ 245,5 см. Результаты те же, чтобы вы могли перекрестно проверить, используя оба метода, чтобы обеспечить точность..
4. Расширение вариантов расчета для различных сценариев Для удовлетворения большего количества потребностей проекта, вот два дополнительных распространенных сценария с примерами расчетов, которые помогут инженерам гибко применять формулы..
- Сценарий 1: Изогнутый экран малой кривизны (Длина хорды 300 см, Стрела 30см)
- Шаг 1: а=150см, б=30см. Подставить в теорему Пифагора: 150² + (Р-30)² = R² → 22500 + Р² – 60Р + 900 = R² → R = 23400 ÷ 60 = 390см
- Шаг 2: Центральный угол θ = 2 × Арккос((390-30)/390) = 2 × Арккос(360/390) = 2 × Арккос(0.923) ≈ 2 × 22,6° ≈ 45.2°
- Шаг 3: Длина дуги L = (45.2 ÷ 360) × 2 × 3.14 × 390 ≈ 0.125 × 2450.4 ≈ 306.3см
- Сценарий 2: Круглый экран большой кривизны (Длина хорды 500 см, Стрела 200см)
- Шаг 1: а=250см, б=200см. Подставить в теорему Пифагора: 250² + (Р-200)² = R² → 62500 + Р² – 400Р + 40000 = R² → R = 102500 ÷ 400 = 256.25см
- Шаг 2: Центральный угол θ = 2 × Арккос((256.25-200)/256.25) = 2 × Арккос(56.25/256.25) = 2 × Арккос(0.22) ≈ 2 × 77,3° ≈ 154.6°
- Шаг 3: Длина дуги L = (154.6 ÷ 360) × 2 × 3.14 × 256.25 ≈ 0.429 × 1610 ≈ 690.7см
IV. Контроль ошибок и практические советы: Обеспечение “Годный к употреблению, Точный” Результаты
Даже при правильном применении формулы, игнорирование контроля ошибок все равно может привести к проблемам при установке. Вот несколько практических советов с трех точек зрения.: “погрешность измерения, применение формулы, и проверка на месте.”
1. Контроль ошибок измерения: Держите отклонение в пределах 5 см
- Измерение длины хорды: Используйте лазерный дальномер с точностью ≥±1 мм.. Среднее значение 3 измерения должны иметь отклонение ≤3 мм от единственного наибольшего значения.. Если длина хорды превышает 500 см., рекомендуется измерять сегментами (например, 2 сегменты, 3 раз каждый) чтобы избежать накопившихся ошибок.
- Измерение стрелки: Сохраняйте вертикальное отклонение ≤2°.. Отклонение измеренного значения от фактического значения должно составлять ≤5 мм.. Если изогнутый экран имеет модульные соединения, вам необходимо провести дополнительные измерения в суставах, чтобы убедиться, что сагитта соответствует “истинная высота поверхности экрана” (не высота рамы).
- Обработка экстремальных сценариев: Для очень больших изогнутых экранов для наружного применения (Длина аккорда > 10м), для измерений рекомендуется использовать тахеометр, который может достичь точности ± 2 мм. Также, установите временные контрольные точки на двух концах и в средней точке дуги, чтобы уменьшить влияние окружающей среды.
2. Ошибки применения формул: Избегать 3 Расчетные ловушки
- Ловушка 1: Запутанные отношения между “стрела” и “радиус,” и непосредственно используя гипотенузу прямоугольного треугольника в качестве радиуса (например, ошибочно использовал c=116,62 см вместо R в исходном случае), приводящие к отклонению в расчете радиуса (правильный R = 113,3 см, отклонение 3,3 см).
- Избегание: Строго составьте уравнение, используя теорему Пифагора для решения R., вместо прямого вычисления гипотенузы прямоугольного треугольника.
- Ловушка 2: Не делить на 2 при расчете центрального угла, что удваивает центральный угол (например, используя ∠AOC как ∠AOB), что приводит к удвоению длины дуги при расчете.
- Избегание: При расчете центрального угла, ясно понимать, что “Угол в прямоугольном треугольнике равен половине центрального угла.” При необходимости, нарисуйте диаграмму, чтобы обозначить угловые соотношения.
- Ловушка 3: Использование разного количества десятичных знаков для π (например, 3.1416) без последовательного подхода, приводящие к противоречивым результатам.
- Избегание: Используйте постоянное значение для π (например, 3.14 или 3.1416), и держи 3 десятичные знаки на протяжении всего расчета. Окончательный результат необходимо округлить до 1 десятичный знак (например, 245.5см) для облегчения настройки модуля.
3. Проверка на месте: А “Последняя линия защиты” Перед установкой
- 1:1 Макет: Для проектов со сложными кривыми (например, двойные кривые, неправильные формы), используйте меловую линию, чтобы обозначить рассчитанные размеры 1:1 на земле. Смоделируйте траекторию дуги, чтобы проверить, соответствует ли она стенам и рамам на объекте..
- Предварительное соединение модулей: Брать 3-5 светодиодные модули и стыкуем их по траектории макета согласно расчетной длине дуги. Проверьте зазоры между модулями (они должны быть ≤1 мм). Если зазоры слишком велики, еще раз проверьте данные измерения длины хорды и сагитты.
- Повторная проверка радиуса: С помощью рулетки измерьте расстояние от двух конечных точек дуги до центра круга. (если можно определить центр). Если расстояние отклоняется от расчетного R на ≤2 см, это говорит о том, что расчет верен. Если отклонение слишком велико, вам необходимо повторно измерить длину хорды и сагитту.
V.. Краткое содержание: А “Основной процесс” для расчета размеров изогнутого светодиодного дисплея
Для простоты применения инженерами, Весь процесс расчета сведен в “4-пошаговый основной метод,” с четкой целью и логикой проверки для каждого шага:
- Измерение базовых данных: Используйте лазерный дальномер + уровень для измерения длины хорды (2а) и стрелка (б). Возьмите среднее значение 3 измерения, с отклонением ≤3мм.
- Найдите радиус (Р): Составьте уравнение, используя теорему Пифагора., а²+(Р-б)²=R², и решить для R, обеспечение отсутствия знаковых ошибок в расчете.
- Вычислить центральный угол (я): Используйте функцию обратного косинуса в прямоугольном треугольнике, чтобы вычислить половину центрального угла., затем удвойте его, чтобы получить θ. Округлите результат до 1 десятичный знак.
- Получить длину дуги (л): Используйте формулу L=(θ÷360°)×2πR для расчета длины дуги, и перекрестно проверить с помощью “длина дуги на градус × θ” метод. Отклонение ≤1 см приемлемо..
Следуя этому процессу, Вы можете гарантировать, что длина дуги, Длина аккорда, и расчеты сагитты для изогнутого светодиодного дисплея точны, предоставление достоверных данных для настройки модуля, конструкция рамы, и установка на месте, тем самым избегая проектных рисков, вызванных отклонениями размеров. В реальных проектах, если вы столкнулись с неправильной кривой (например, эллиптическая кривая), вам нужно будет ввести эллиптические уравнения. Рекомендуется сотрудничать с инженером-строителем и производителем экрана для разработки решения, которое гарантирует, что конечный результат будет соответствовать ожиданиям проекта..
